Creating a telegram campaign from the contacts tab
Whether you’re running retargeting campaigns, reviving lost opportunities, adding fresh contacts to an existing campaign, or ensuring your customers stay updated on your company’s latest news, you’ll need to create a campaign right from the contacts tab in your CRM. This guide will show you how to do it in just a few easy steps.
Step 1: Select Relevant Contacts
- Navigate to the Contacts tab under Customer Engagement.
- Select the relevant contacts for your campaign by filtering them.

- Once selected, a pop-up will appear in the bottom.
- Hover over "Add to campaign" and click on the Telegram icon.

Step 2: Define the Campaign Name
- Create a new campaign and sequence by naming them uniquely.

- Alternatively, add contacts to an existing campaign.
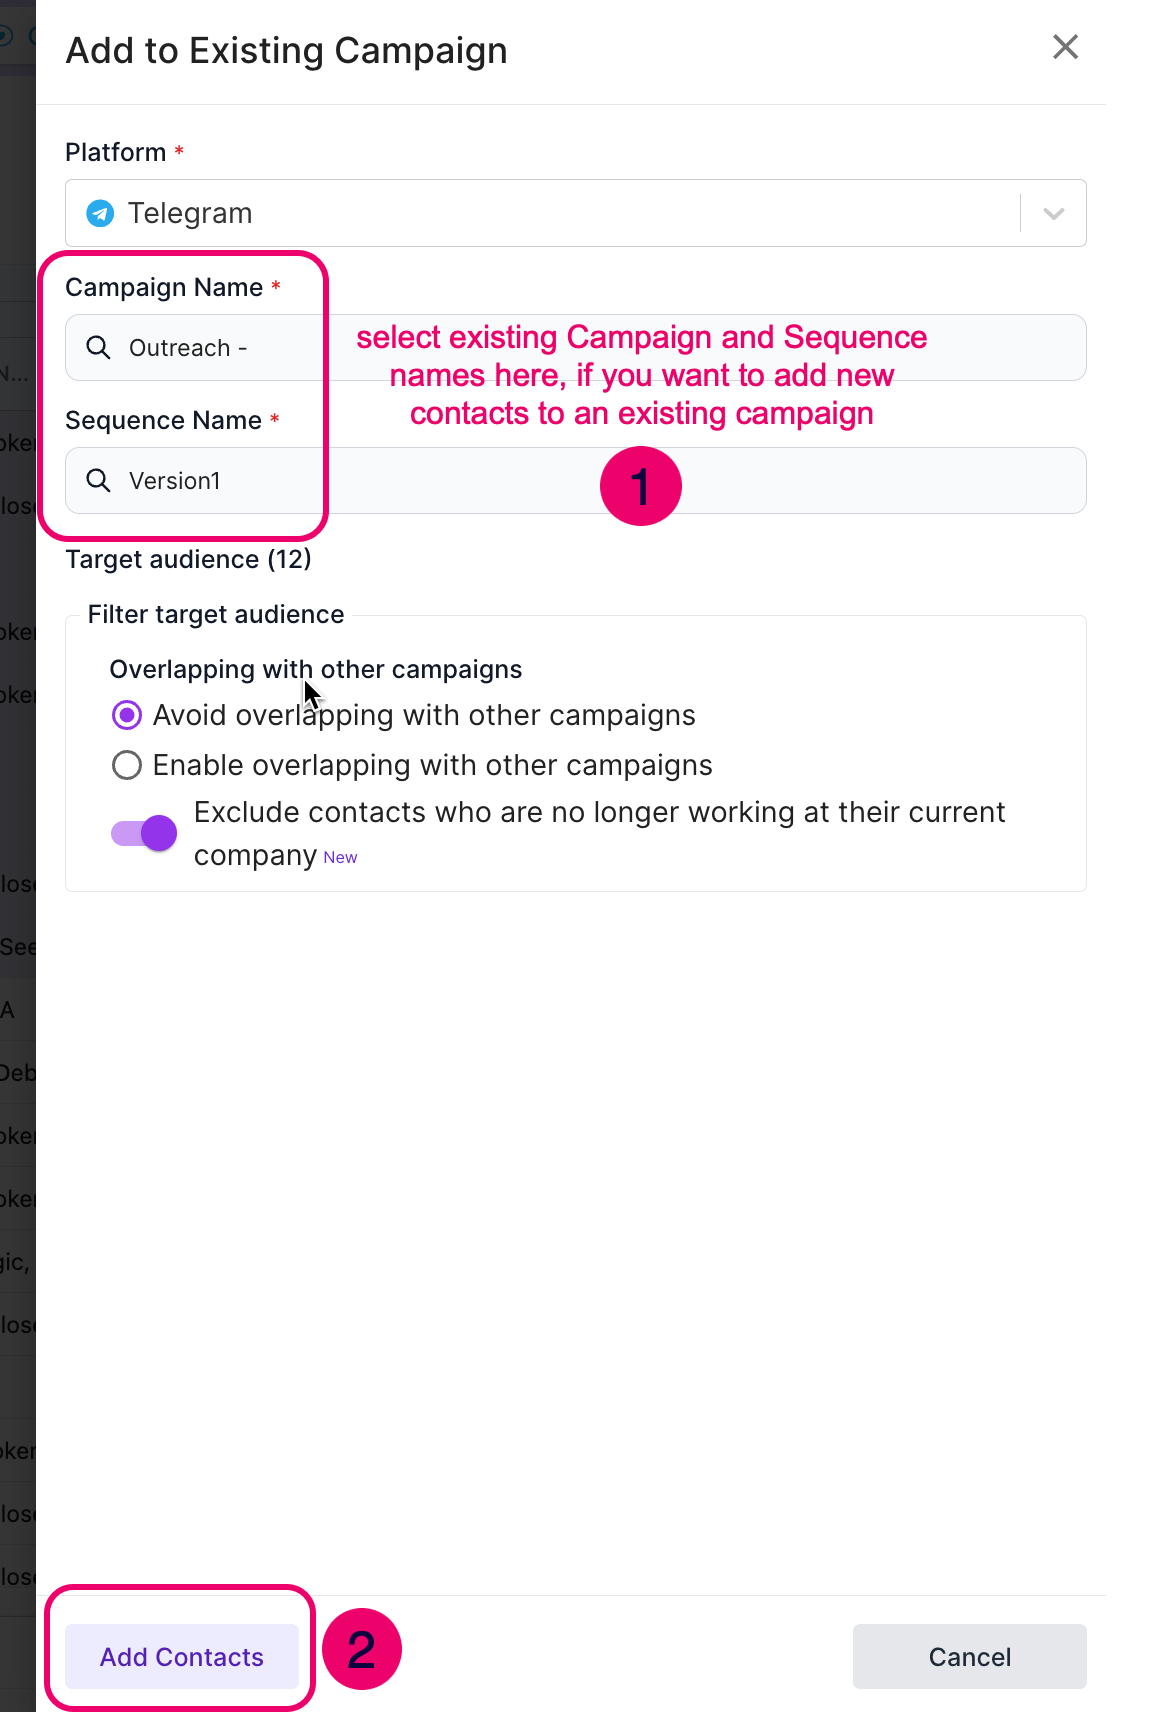
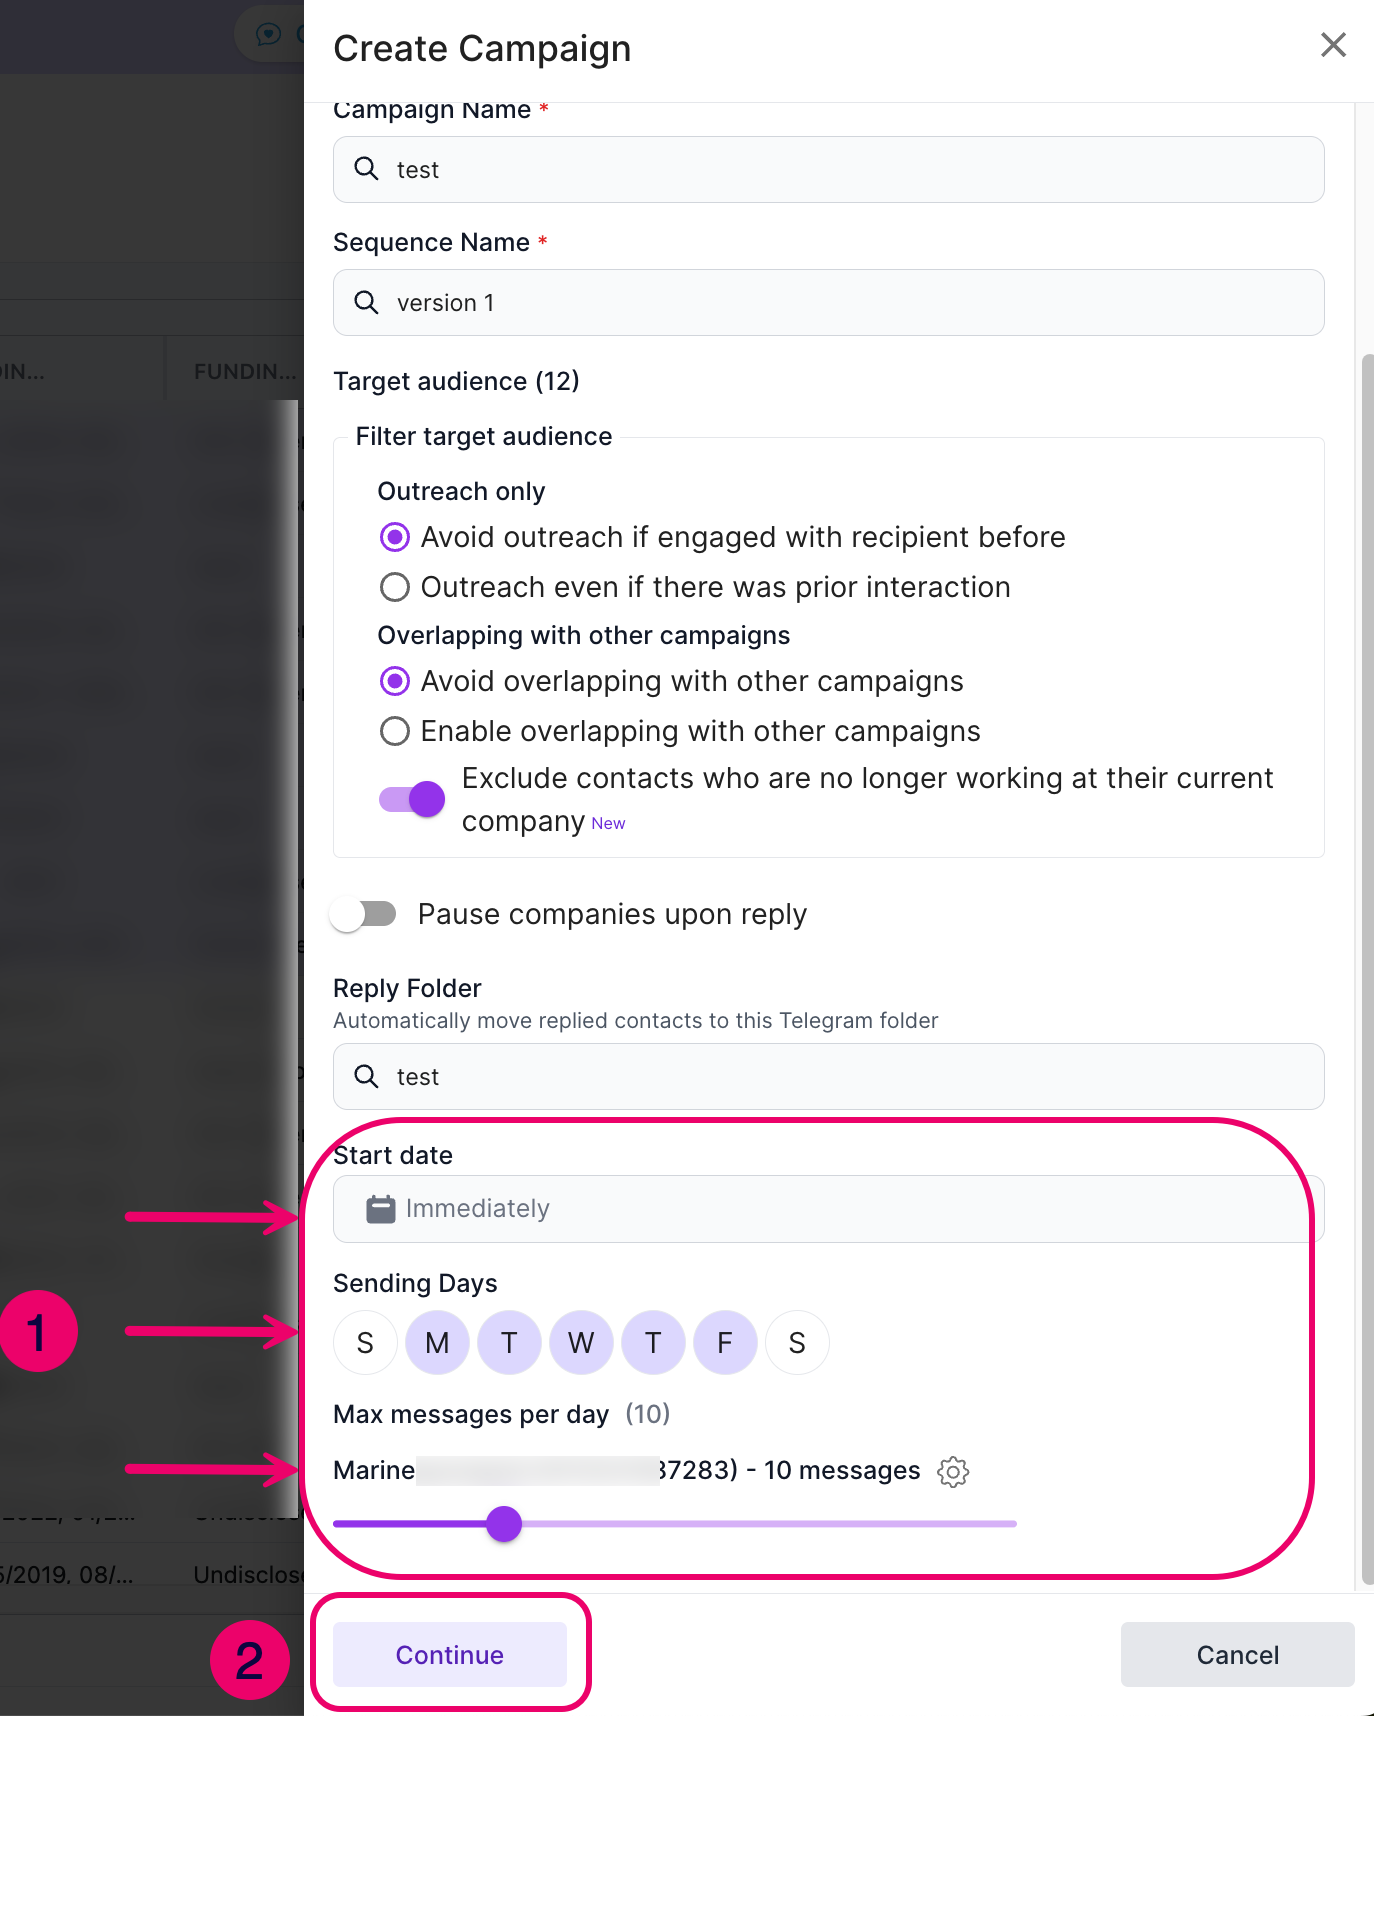
Step 3: Define a Sequence
A sequence is a structured set of messages that will be sent to recipients. While defining the sequence:
- View the total number of recipients in your campaign.
- Apply Filtering Options:
- Avoid Overlapping: Prevent duplicate messages to recipients already in another campaign.
- Outreach Only: Ensure messages are sent only to new contacts.
- Reply Folder: Automatically create a folder for replies related to this campaign.
NB: If you’re running a retargeting campaign, it means you’ve already engaged with these individuals. In this case, be sure to enable the “Outreach even if there was prior interaction” option.
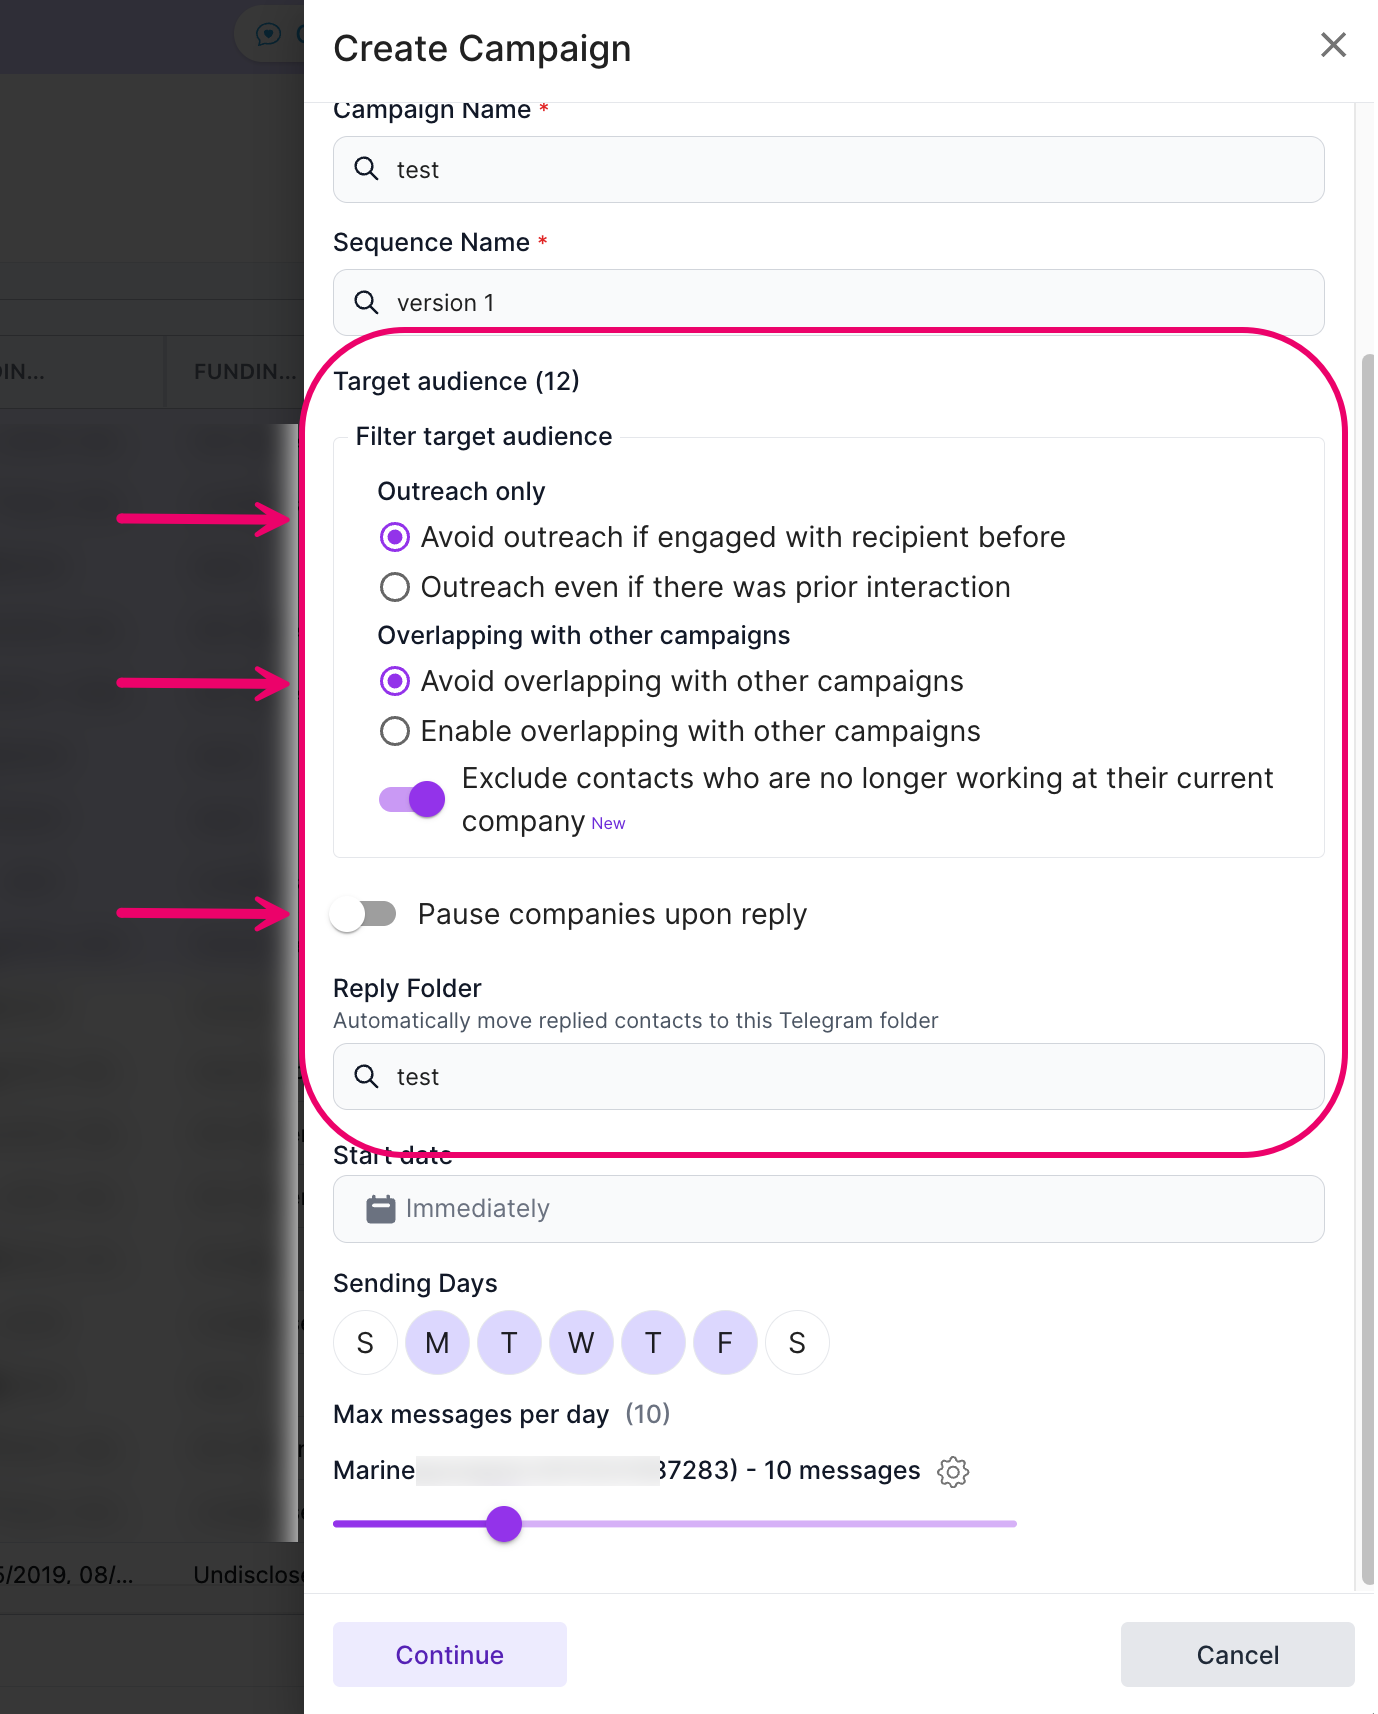
Step 4: Set Campaign Timing
- Start Date: Start immediately or schedule for later.
- Days for Sending Messages: Avoid weekends by default but adjust as needed.
Daily Message Limits: Default is 20 messages per day. Increase up to 45 for Telegram Premium accounts.
Step 5: Craft Your Messages
- Use placeholders like {{First Name}} for personalization.
- Add a follow-up message for contacts who haven’t responded.
- Maintain a friendly, conversational tone to increase engagement.

Step 6: Review and Launch the Campaign
- Review all campaign details in the summary screen before launching.
- Confirm accuracy and launch your campaign.

Additional Tips
For more insights and best practices, check out our blog where we share success stories and expert outreach strategies.
Need Help?
If you have any questions, feel free to reach out to our support team. We’re here to help you maximize your outreach success!