Creating a campaign from the conferences Tab
Attending Web3 conferences and networking is critical for sales, branding, and growing your business. The Conferences tab helps you engage with attendees before, during, and after an event.
Why Use the Conferences Tab?
- Identify and reach out to attendees before the event.
- Filter prospects based on industry relevance.
- Follow up with potential leads after the event.
- Book 1:1 meetings to build partnerships at key events like TOKEN2049 and Consensus.
Step 1: Navigate to the Conferences Tab
- Open the Conferences tab on the left sidebar.
- View upcoming Web3 conferences.
- Select the conference you are targeting.
- Access the list of attendees.

Step 2: Filter the Attendee List
- By Event: Choose the conference you’re targeting.
- By Industry or Role: Focus on attendees relevant to your business goals.

Step 3: Identify and Add Contacts to a Campaign
- Select your target attendees.
- In the modal at the bottom, click Add to Campaign.
- If contacts display a lock 🔐 icon, add them to the CRM first
Nb: (Once added, you can locate them under Customer Engagement > Contacts.)

- Name your leads group and click on continue.

- Click on “Yes, create campaign”
- Tick “Telegram” and click on Continue
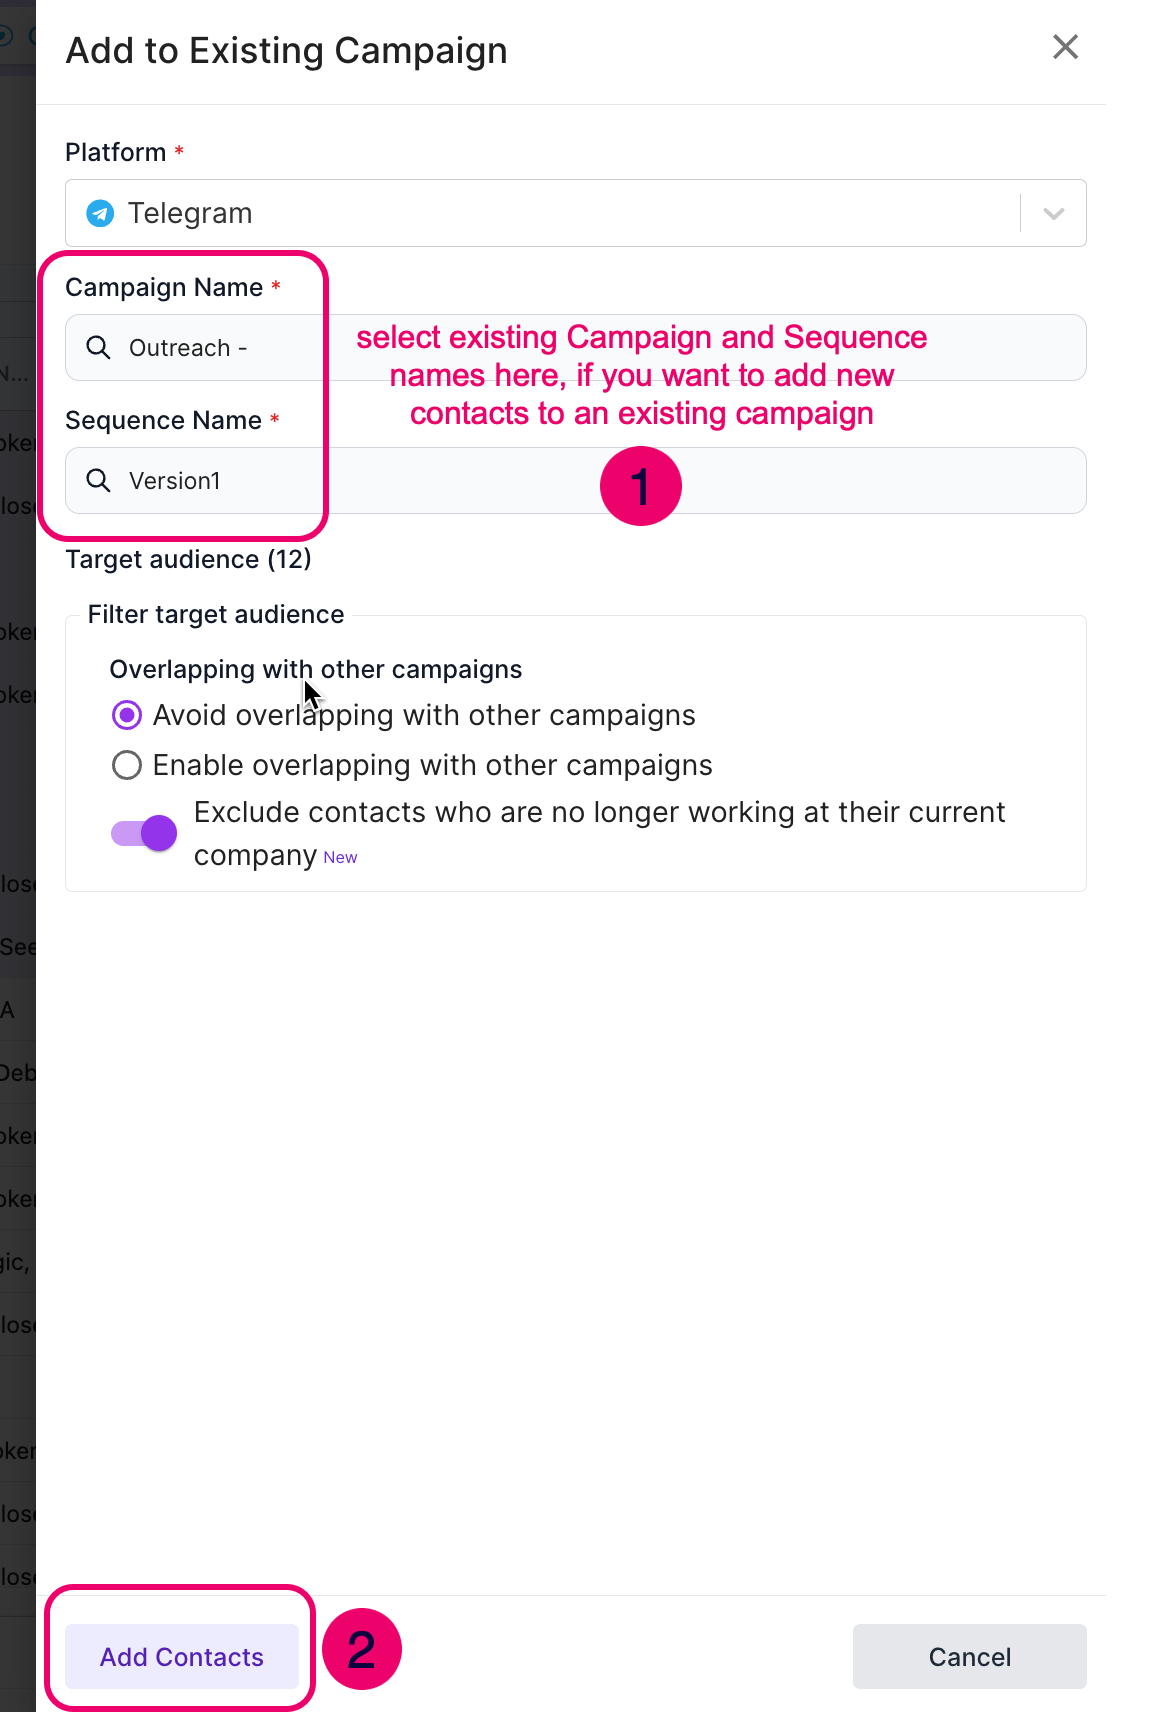
Step 4: Define the Campaign Name
- Choose a campaign name that reflects your outreach strategy.

- Optionally, add attendees to an existing campaign.
- Click Add contacts to confirm.
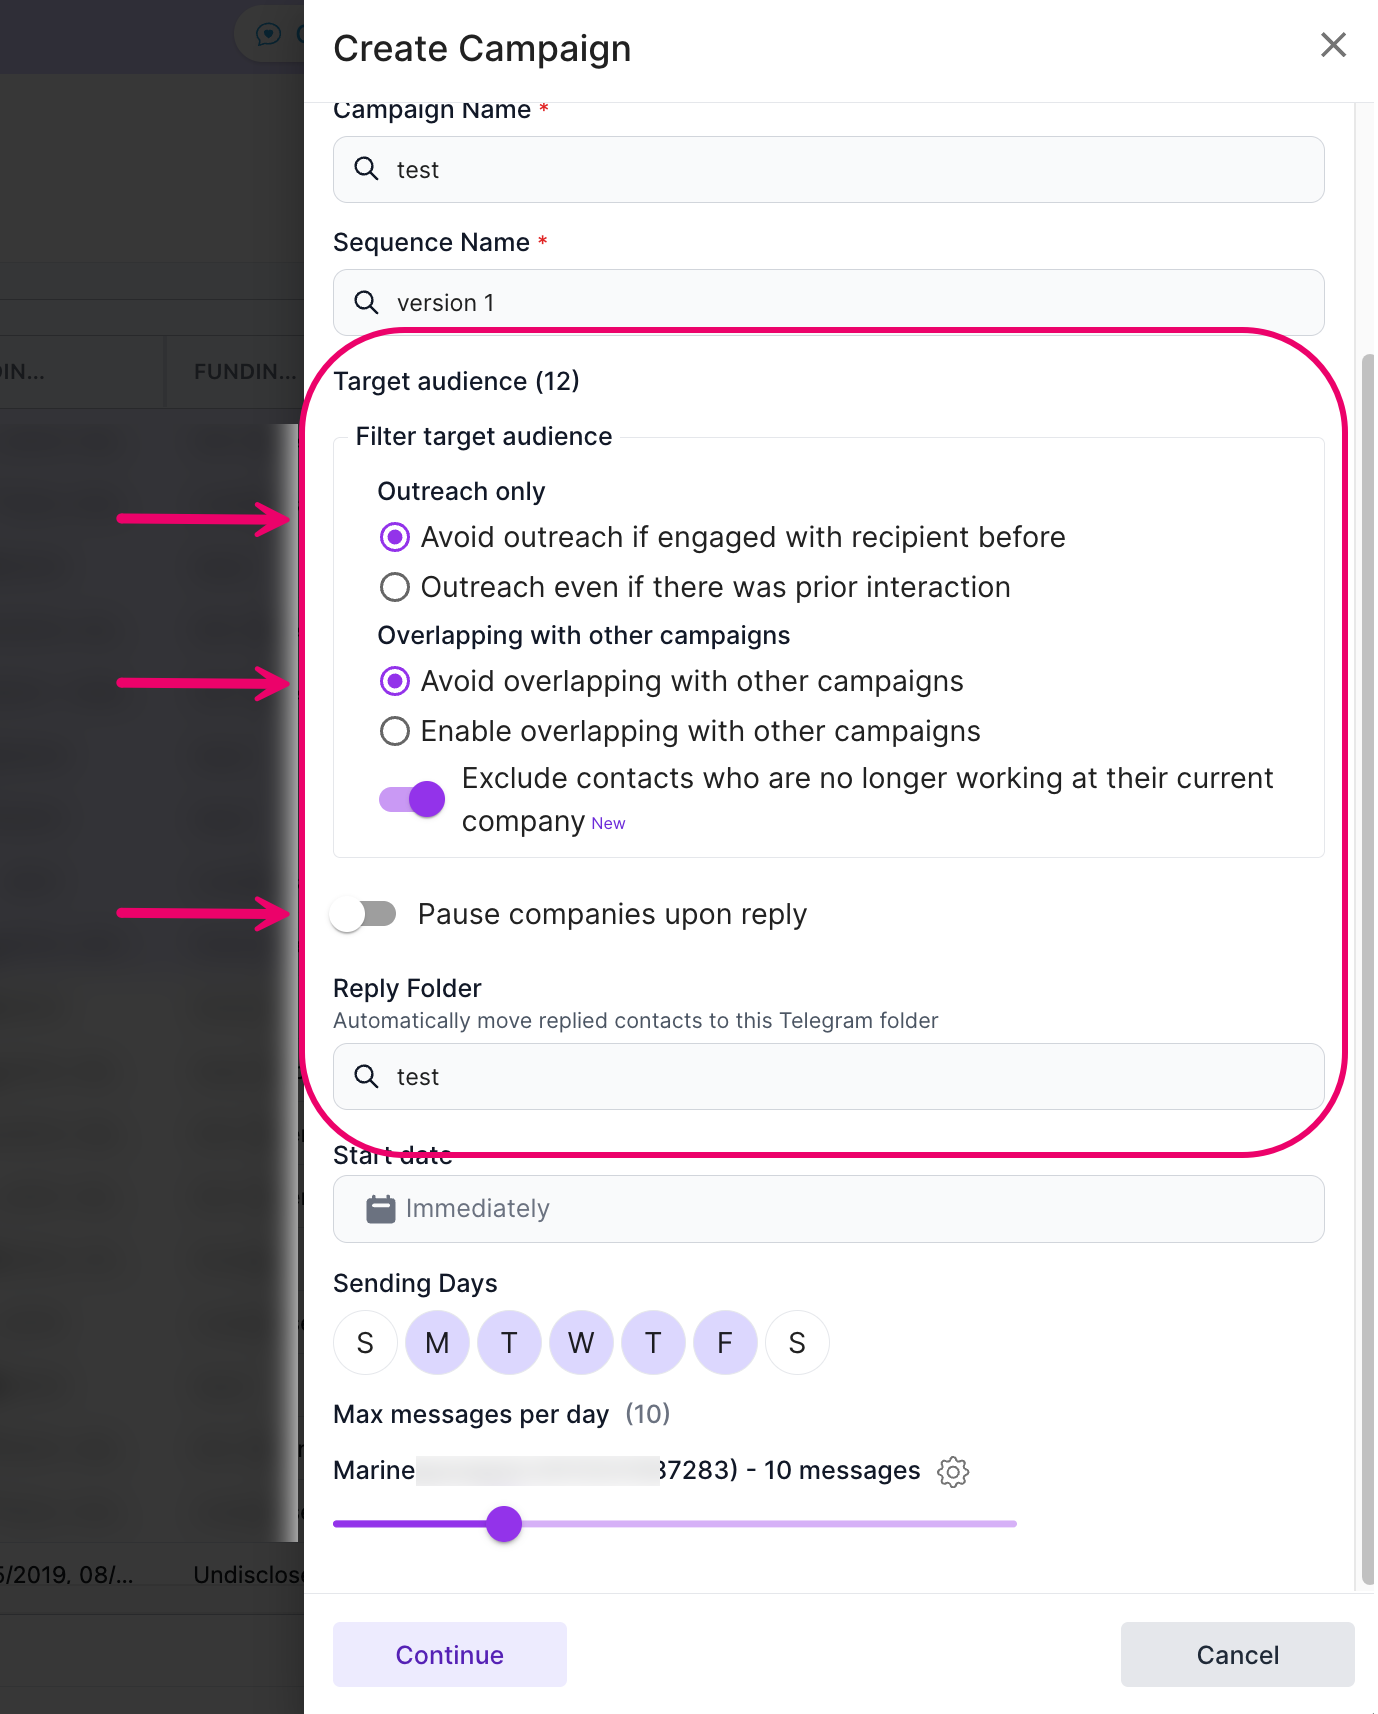
Step 5: Define a Sequence
A sequence is a structured set of messages that will be sent to recipients. While defining the sequence:
- View the total number of recipients in your campaign.
- Apply Filtering Options:
- Avoid Overlapping: Prevent messages to attendees already contacted in another campaign.
- Enable Overlapping: If you want to re-engage past recipients.
- Reply Folder: Create a dedicated folder for managing replies efficiently.
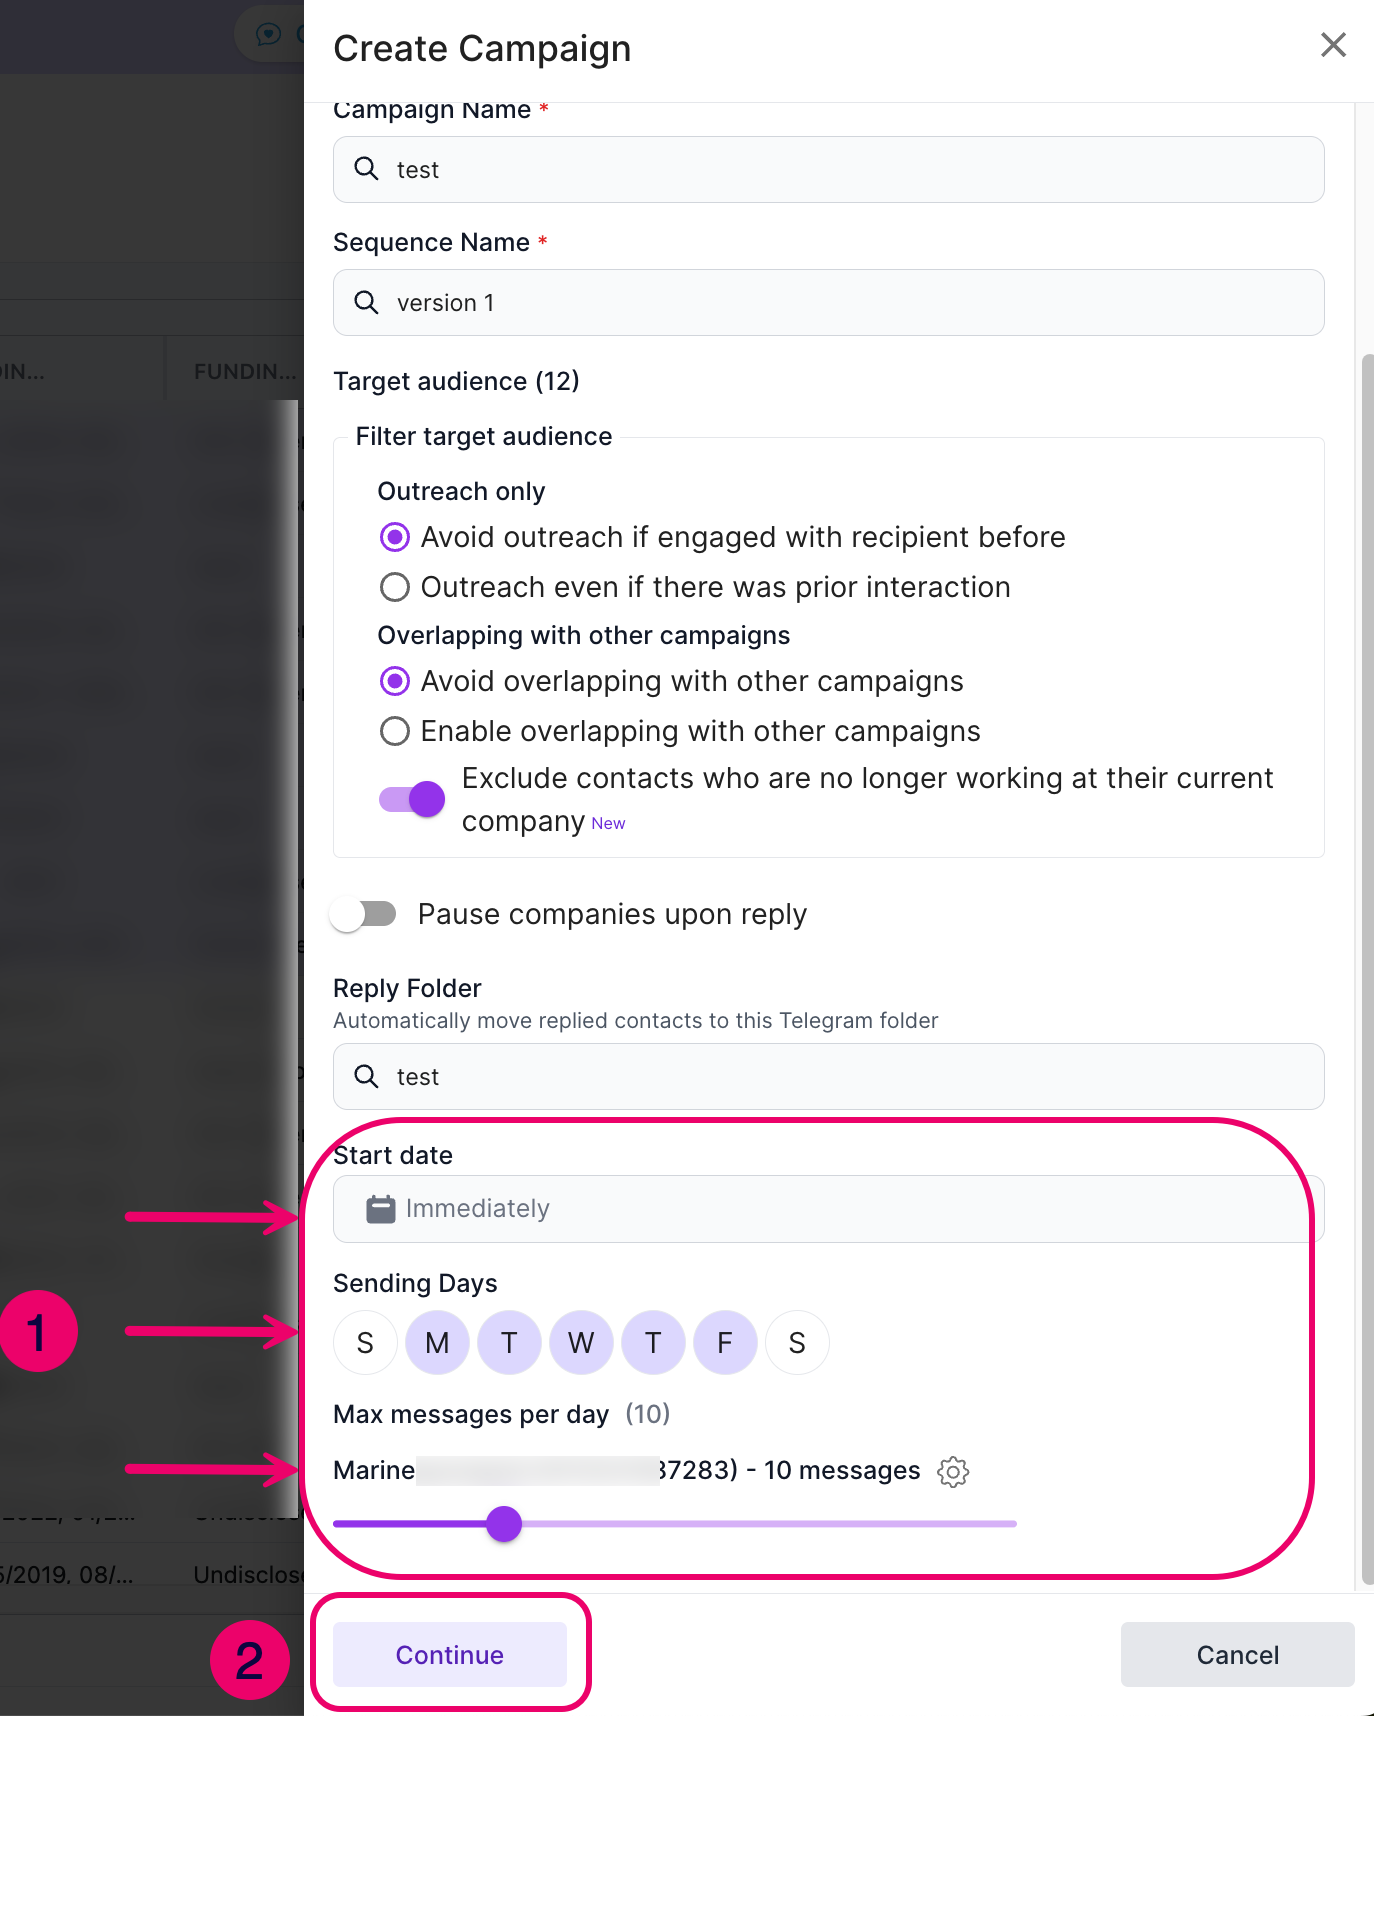
Step 6: Set Campaign Timing
- Start Date: Default is immediate; schedule for later if needed.
- Days for Sending Messages: Avoid weekends but customize as required.
- Daily Message Limits: Default 20 messages per day (increase if needed).
Step 7: Craft Your Outreach Message
- Personalize Messages: Use placeholders like {{FIRST_NAME}} or {{COMPANY}}.
- Mention the Conference: Highlight the event and ask about their attendance plans.
- Propose a Meeting: Include a link to your calendar for scheduling.
- Follow Up: Send a follow-up message to re-engage unresponsive contacts.

Step 8: Review and Launch the Campaign
- Review all campaign details in the summary screen before launching.
- Confirm accuracy and launch your campaign.

Additional Tips
For more insights and best practices, check out our blog where we share success stories and expert outreach strategies.
Need Help?
If you have any questions, feel free to reach out to our support team. We’re here to help you maximize your outreach success!